
<aside>
Welcome to the guide on creating an account from our website and integrating it with Genesys Cloud CX. Follow the steps below to seamlessly connect both platforms. Let's get started!
https://www.youtube.com/watch?v=Q1klFh5hTYk
STEP 1. Navigate to webpage https://management.trueengage.com/register, complete your personal information, ensuring to provide your work email address and select your position. Click on Create Account button.
STEP 2. Go to your inbox and click on the activation link to confirm your account.

STEP 3.
When you click on the link in the email, you will be taken to set your password to access the management panel.

STEP 4.
After setting the password, we can log in to the email provided at registration

STEP 5.
After logging in, we see the steps we need to take to be able to fully use TrueEngage.

STEP 6.
Click on the Send instructions button next to the Genesys connection to send installation instructions to your Genesys Cloud Admin or Genesys Partner.

<aside> 💡 If you have admin permissions to add a solution from AppFoundry then just send this message with instructions to yourself.
</aside>
After creating your account, we need to connect it with Genesys Cloud CX. You'll find instructions on how to do this in the steps below 👇
https://www.loom.com/embed/7c7ebe49d90f40aa867512d98455e7a0?sid=0e92d966-97e5-4c9d-a1ee-333981c1ad4e
STEP 1.
Go to TrueEngage on AppFoundry https://appfoundry.genesys.com/filter/genesyscloud/listing/d3d5011e-668b-411c-bc8d-512e3023b359
STEP 2.
Click install button, read the details, and then click Purchase.
STEP 3. Add the TrueEngage permission to any user you’d like to have access to TrueEngage install wizard: Integration > TrueEngage > View.
<aside> 💡 You don’t need to add this role to all users who will use the integration - TrueEngage wizard will generate an application instance and dedicated group that will have access to TrueEngage_ManagementPanel.
</aside>

STEP 4. In Your Genesys Cloud account, go to Admin → Integrations → Integrations tab, find the TrueEngage app in the list and change its status to Active.
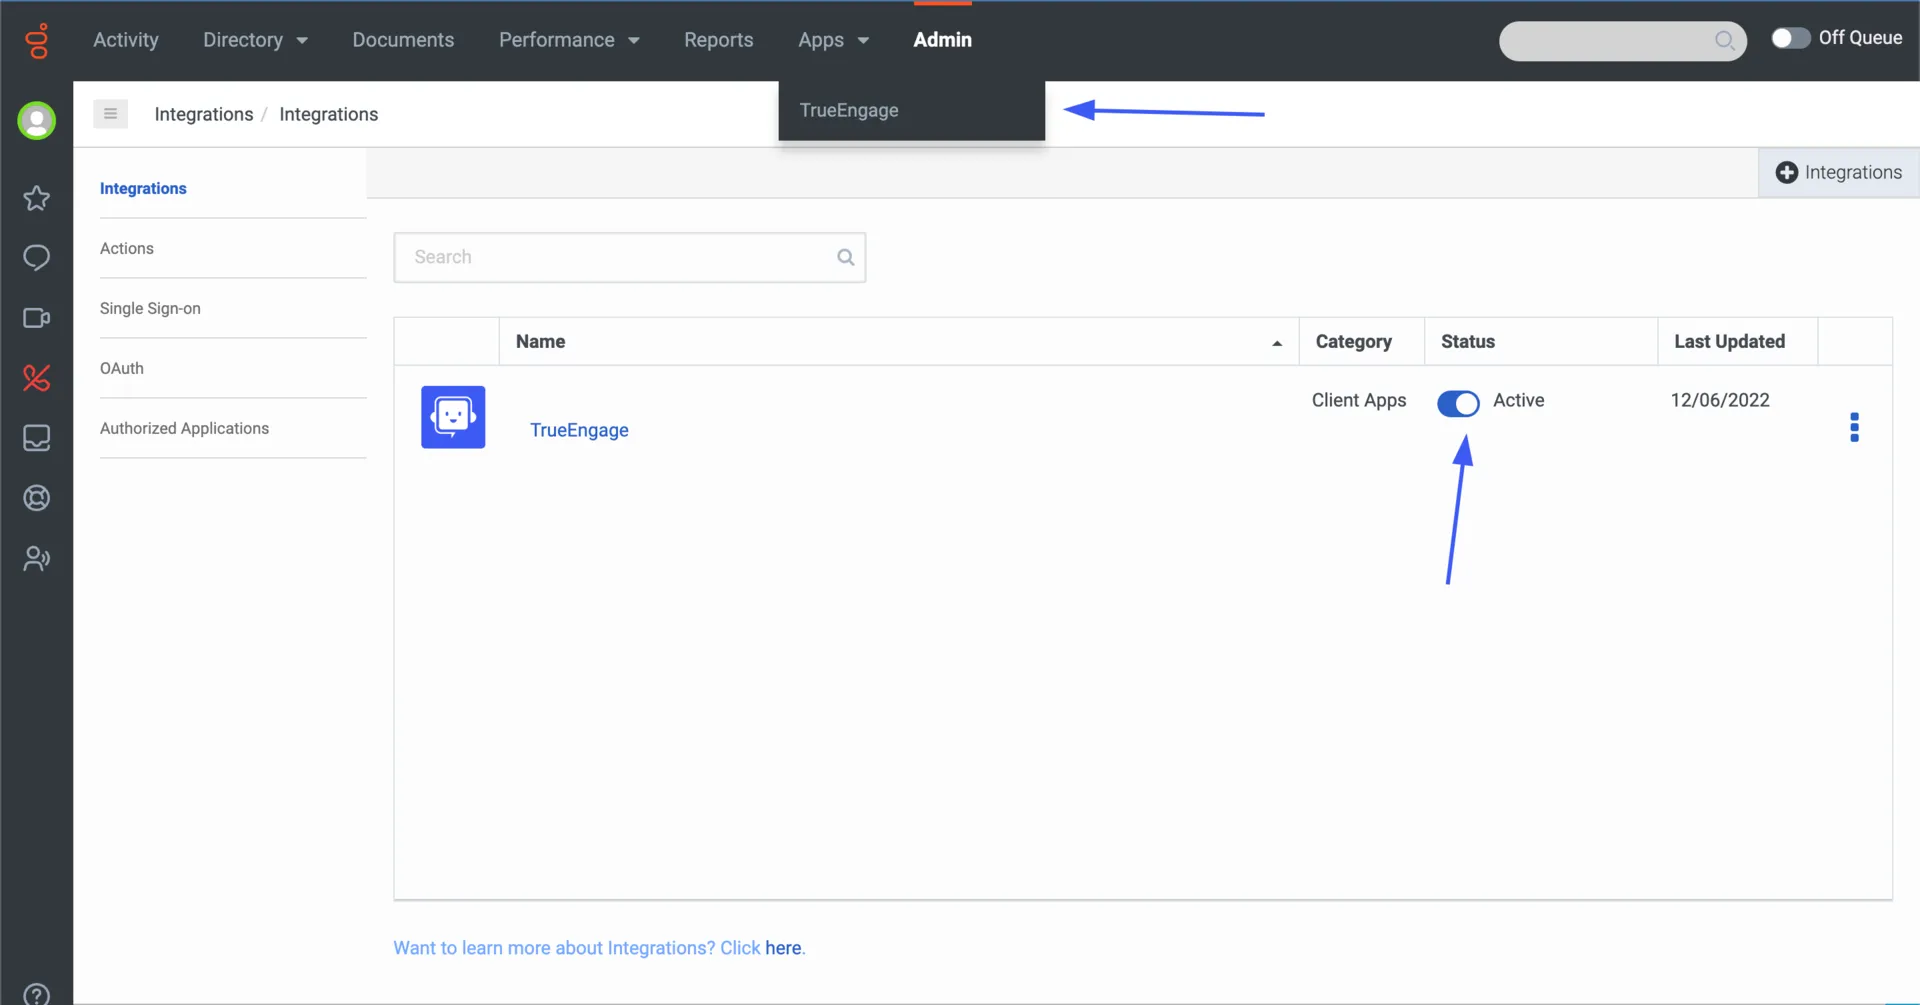
STEP 5. Expand the Apps list in the navigation panel at the top and select TrueEngage app. You will go straight to the installer.
💡If you don’t see the Apps tab, or there is no TrueEngage item on it → simply refresh the page.
STEP 6. Follow the instructions in the TrueEngage wizard in the second step select Integrate existing account option and enter the token you received in the email/copied from the TrueEngage panel.
<aside> 📢
You can find the unique token in the email you received
</aside>

STEP 7. Continue to ****follow the instruction on TE Wizard until installation is complete
✅ Congratulations! You've reached the end of the instructions. Your TrueEngage account should be properly configured with Genesys Cloud.
If you encounter any problems please contact us at [email protected]